MICROSERVICES WITH .NET 5+(6)
Gather together those things that change for the same reason, and separate those things that change for different reasons.
What are “Microservices”?
- These rely majorly on the SRP (Single Responsibility Principle).
- Small services which typically take considerably less time to build.
- A project could comprise of several microservices. Each of them would be responsible for doing only one thing, but REALLY WELL!!
- Services would still communicate among themselves, but won’t rely on each other for functionality.
- Organizationally aligned - The owner have full control over these services.
- For a full services solution essentially a bunch of smaller microservices are needed. These form part of a distributed system.
- Self contained and autonomous - Stand up on their own.
History & The need for Microservices
- Single monolithic systems although look and feel more stable, but are difficult to modify.
- These also need massive amount of frequent testing (too much effort for smallest of change).
- Difficult to scale.
- Locked in - To the technology stack and intellectual property terms (held by external or 3rd party parts).
- In contrast, microservices are smaller and decoupled making them easier to change and deploy.
- Microservices could be build using different technologies and these could easily be swapped for better performance.
- Microservices have increased organizational ownership and alignment. Each part is owned solely by one organization and they could choose what to do with them.
- Resilient - one Microservice could break, others will continue to run.
- Scalable - We can scale out only the services we need to.
- Built to be highly replaceable and swappable.
Example
- Lets consider an Airline service which has 3 microservices, all developed in different parts of the world, with different languages and all use different data storage platforms.

- Suppose one of these services are down, the users would still be able to use the other two services and the whole airline booking system as a whole won’t crash.
- Now if a sale comes up, scaling up/down the services is easy -

Microservices Vs Monoliths
| Microservices | Monoliths |
|---|---|
| Writing a single or a few microservices is fine, but designing and creating a full microservices architecture is quite difficult. These are difficult to implement. | Simpler to implement. |
| To design, these need strong domain knowledge and can result in “analysis paralysis” (not knowing which components to break down and where to start). | Can use CI/CD, daily deploys, small changes, etc. Allows us to familiarize with the domain. |
| Distributed - The network failure needs to be considered while working with services created and deployed under different geographical locations. | Can have 2 or 3 “big” services. |
| Paradoxically will always be coupled to something. We want to avoid chatty microservices, but still need some coupling (to DB, other services, etc.). | Not as reliant on network. |
Overview
- We would be building 2 services -
- The “Platform” Service - Created for Asset management. Built by Infrastructure team and used by infrastructure team, technical support team, engineering, accounting and procurement.
- The “Commands” Service - Functions as a repository for all command line arguments for given platforms. Aids in automation of support processes. Used by - infrastructure team, technical support team and engineering.
Solution Architecture

- For communication -

- To scale up (still decoupled architecture) -

- GRPC - Synchronous

Platform Service Architecture

Command Service Architecture

Basic Setup
- Start up the console (VS Code inbuilt terminal or command prompt) inside the project location.
- Run the command “dotnet” to check the version.
- Create a new webapi project with CLI as -
dotnet new webapi -n PlatformService
- If you are inside VS code terminal, after creating the project open it recursively in VS Code with command -
code -r PlatformServiceCODE
- Start the Developer’s terminal, switch to the repo folder and run the commands below -

- This will open VSCode editor. Install C# Extension (if already not present). This would prompt to add ‘Additional files’. Agree to that (adds .vscode folder with 2 files - launch.json and tasks.json).

- tasks.json - This file specifies how core is going to run different tasks for us - Build, Publish, Watch, etc. The main one being ‘Build’, states what would build command do and what arguments would get passed.
- launch.json - Describes how the solution is going to get launched from Visual Studio perspective. Has information such as - what Prelaunch event gets fired(build), where the dlls get generated(program), what to do when the server is ready(open browser), what is the aspnetcore environment value(development/production).

- Build the solution first.

- Once built, the solution could run now.

- Once running the localhost:port would open on browser, add ‘/swagger’ to see the API in action(test it out by executing).

-
To make the subsequent builds easier -
- Ctrl + Shift + B → Builds the solution.
- Add a section to the ‘build’ task under tasks.json file as -
→ This actions leads to Ctrl+Shift+B getting set as Build shortcut.
-
To set the F5 to always open swagger on successful build, add ‘urlformat’ value to the launch.json file as -


- Easier way would be to just build the solution(and not launch the browser every time) and use Postman to test the API. Use swagger ‘Try it out’ to copy the request URL (in our case -
https://localhost:7009/WeatherForecast)

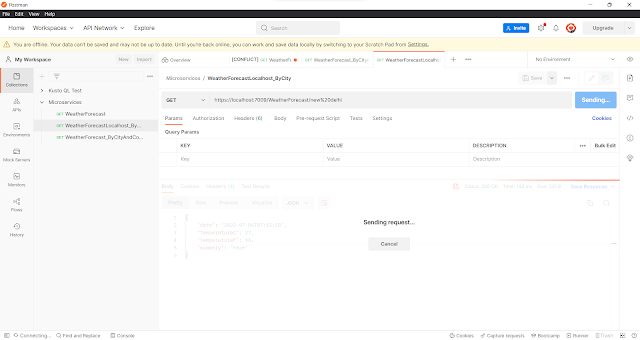
- To do this, comment the ‘serverReadyAction’ from launch.json and press F5. This would now just notify in the terminal that the endpoint is listening. Now create as many requests in Postman as required and test the API without launching or refreshing the browser for every single change!!

- Open the weather API - https://openweathermap.org/current#name:~:text=https%3A//api.openweathermap.org/data/2.5/weather%3Fq%3D{city name}%26appid%3D{API key}
- The API documentation has all the details needed for the API calls.
- To get the API key, create an account (https://home.openweathermap.org/users/sign_in) and generate one as shown below -


→ Fetch the city name (http://bulk.openweathermap.org/sample/) and API Key to get the response -

-
To view the temperature in metric units, append - &units=metric at the end of the request URL (https://api.openweathermap.org/data/2.5/weather?q=New Delhi&appid=d7e9a29d7d4396ca2d53b13a281ae398&units=metric)
To access the same API with API URL and Key through the code, we need to configure both these values in our code. To do that -
- URL - Add a key-value pair in the appsettings.json file

dotnet user-secrets set ServiceSettings:ApiKey d7e9a29d7d4396ca2d53b13a281ae398
→ Here colons would determine the nesting level in the created secrets file.
→ This secrets file won’t be shown in the solution, but would be stored somewhere hidden. It is suggested to only use this file for development purposes.

→ init would add a new tag to the .csproj file as -

-
Next, add a ServiceSettings.cs class to the solution to hold these two values.
{
class ServiceSettings
{
public string OpenWeatherHost { get; set; }
public string ApiKey { get; set; }
}
}- To add this class to the services (ConfigureServices, pre core 6 concept under Startup.cs) add the code to the Program.cs -
builder.Services.Configure<ServiceSettings>(builder.Configuration.GetSection(nameof(ServiceSettings)))
→ The second line would make sure to fetch the section named ‘ServiceSettings’ from the configuration file and map the values found to an instance of the ‘ServiceSettings’ class.

- Now we need a client to call the API. Add a new class ‘WeatherClient.cs’ to the solution.
namespace HelloDotnet5
{
class WeatherClient
{
private readonly HttpClient httpClient;
private readonly ServiceSettings settings;
public WeatherClient(HttpClient httpClient, IOptions<ServiceSettings> options)
{
this.httpClient = httpClient;
settings = options.Value;
}
public record Weather(string description);
public record Main(decimal temp);
public record Forecast(Weather[] weathers, Main main, long dt);
public async Task<Forecast> GetCurrentWeatherAsync(string city)
{
var forecast = await httpClient.GetFromJsonAsync<Forecast>($"https://{settings.OpenWeatherHost}/data/2.5/weather?q={city}&appid={settings.ApiKey}&units=metric");
return forecast;
}
}
}
→ HttpClient is to be used to call an external URL (like Weather app).
→ Through IOptions we get the value for the services configured under the builder in Program.cs
builder.Services.Configure<ServiceSettings>(builder.Configuration.GetSection(nameof(ServiceSettings)));
→ option.value - Configuration section
- RECORD TYPE - A new data type specifically for picking up complex values from the API response (nested objects). This way, we no longer need to create classes to map the response structure. Instead we could pick selected values by their keys as -
public record Main(decimal temp);
- To call the city API, add a method to the WeatherClient as -
{
var forecast = await httpClient.GetFromJsonAsync<Forecast>($"https://{settings.OpenWeatherHost}/data/2.5/weather?q={city}&appid={settings.ApiKey}&units=metric");
return forecast;
}
→ Use string interpolation to replace the values fetched from the config file (settings).
- Now we need to inject this client to the builder services in Program.cs as -
builder.Services.AddHttpClient<WeatherClient>();- Once done with the client, we move to the controller (Controllers > WeatherForcastController.cs). Update the code as -
namespace HelloDotnet5.Controllers;
[ApiController]
[Route("[controller]")]
public class WeatherForecastController : ControllerBase
{
private readonly ILogger<WeatherForecastController> _logger;
private readonly WeatherClient client;
public WeatherForecastController(ILogger<WeatherForecastController> logger, WeatherClient client)
{
_logger = logger;
this.client = client;
}
// [HttpGet(Name = "GetWeatherForecast")]
[HttpGet]
[Route("{city}")]
public async Task<WeatherForecast> Get(string city)
{
var forcast = await client.GetCurrentWeatherAsync(city);
return new WeatherForecast{
Summary = forcast.weather[0].description,
TemperatureC = (int)forcast.main.temp,
Date = DateTimeOffset.FromUnixTimeSeconds(forcast.dt).DateTime
};
}
}
→ Make sure to inject the WeatherClient to the constructor (encapsulate to add a private readonly property and a default assignment).
→ Update the Get() method attribute to include the city in the route as well (instead of
https://localhost:<port#>/WeatherForecast the url would be
https://localhost:<port#>/WeatherForecast/<city>).
→ Using the client injected, call the GetCurrentWeatherAsync(city) method.
→ Also update the return type of Get() as a single WeatherForcast object and assign the same from the method call response mentioned above.
→ To test it out, put breakpoints in the controller and run(F5) the solution and execute the call from Postman with URL - https://localhost:7009/WeatherForecast/new delhi
- What happens if the OpenWeather API is down (test by running postman with wifi turned off)? - The response:

→ Solution: Add Retries (using NuGet package - Microsoft.Extensions.Http.Polly)
Adding Retries with Microsoft.Extensions.Http.Polly
- Install this package with command -
dotnet add package Microsoft.Extensions.Http.Polly
Polly package has been around for long and is used to specify transient error policies.- Specifies how we want the errors to be handled.
- No need to modify the entire project to handle errors and retries. Just update the Program.cs as -
builder.Services.AddHttpClient<WeatherClient>()
.AddTransientHttpErrorPolicy(builder =>
builder.WaitAndRetryAsync(10, retryAttempt =>
- To the AddHttpClient() call we add the TransientHttpErrorPolicy, which in turn would have a WaitAndRetryAsync() call on the builder with 10 retries on the intervals of 2 raised to the power of # of retry.
- This leads to the waits (in seconds) of - 2, 4, 8, 16, 32, 64, 128, 256, 512 and 1024.
- This is called adding an Exponential Backoff.
- Now if we switch off our wifi, run the solution, run the Postman and observe our VSCode terminal, we would see the multiple GET calls being made (and fail). Once the wifi is turned on, the GET call succeeds (200).


- What happens if the issue with the server persists for a while? We don’t want to make the user wait for a response forever. What do we do then?
- Solution: Implement a Circuit Breaker.
Circuit Breaker
- To the same HttpClient Service injection to the builder in Program.cs add another transient policy as -
builder.Services.AddHttpClient<WeatherClient>()
.AddTransientHttpErrorPolicy(builder =>
builder.WaitAndRetryAsync(10, retryAttempt =>
TimeSpan.FromSeconds(Math.Pow(2, retryAttempt))))
.AddTransientHttpErrorPolicy(builder =>
- Now turn off the wifi, run the solution, run the postman and observe the VSCode terminal to see 3 retry attempts being made and then the Postman window says - “Polly.CircuitBreaker.BrokenCircuitException: The circuit is now open and is not allowing calls.”


- The subsequent calls would return response fairly faster.
- Can we detect the situation before this happens?
- Solution: Yes. Through Health Check.
Health Check
- To be proactive and do a health check of external API endpoints before trying to fetch data from it.
- Better to add a separate class and implement the IHealthCheck interface.
- Add a new class to the solution - ExternalEndpointealthCheck.cs
using Microsoft.Extensions.Diagnostics.HealthChecks;
using Microsoft.Extensions.Options;
namespace HelloDotnet5
{
public class ExternalEndpointHealthCheck : IHealthCheck
{
private readonly ServiceSettings settings;
public ExternalEndpointHealthCheck(IOptions<ServiceSettings> options)
{
settings = options.Value;
}
public async Task<HealthCheckResult> CheckHealthAsync(HealthCheckContext context, CancellationToken cancellationToken = default)
{
Ping ping = new(); //New way of declaring new types - Simplified with .net 5
var reply = await ping.SendPingAsync(settings.OpenWeatherHost);
if(reply.Status != IPStatus.Success) {
return HealthCheckResult.Unhealthy();
}
return HealthCheckResult.Healthy();
}
}
}
→ Make sure to inject the IOptions<ServiceSettings> dependency via the constructor in order to get the Weather API host name.
- Implement HealthCheckAsync() by trying to send a ping to the settings.OpenWeatherHost (host URL). Monitor the reply.
- Send a Healthy/Unhealthy response based on the status of the reply.
- Next, inject this health check to the builder services under Program.cs as -
using System;
using System.IO;
using Microsoft.Extensions.Configuration;
using Polly;
internal class Program
{
private static void Main(string[] args)
{
var builder = WebApplication.CreateBuilder(args);
// Add services to the container.
//Adding configuration service
builder.Services.Configure<ServiceSettings>(builder.Configuration.GetSection(nameof(ServiceSettings)));
builder.Services.AddControllers();
builder.Services.AddEndpointsApiExplorer();
builder.Services.AddSwaggerGen();
//Adding our Http client to the services
builder.Services.AddHttpClient<WeatherClient>().AddTransientHttpErrorPolicy(builder => builder.WaitAndRetryAsync(10, retryAttempt => TimeSpan.FromSeconds(Math.Pow(2, retryAttempt)))).AddTransientHttpErrorPolicy(builder => builder.CircuitBreakerAsync(3, TimeSpan.FromSeconds(10)));
//Health check
builder.Services.AddHealthChecks()
.AddCheck<ExternalEndpointHealthCheck>("OpenWeather");
var app = builder.Build();
// Configure the HTTP request pipeline.
if (app.Environment.IsDevelopment())
{
app.UseSwagger();
app.UseSwaggerUI();
}
app.UseHttpsRedirection();
app.UseAuthorization();
app.MapControllers();
//Register Health Checks
app.MapHealthChecks("/health");
app.Run();
}
}- This makes the health check URL as - https://localhost:7009/health
- Add a Postman call to this and monitor the response when wifi is turned On Vs Off.
- Response when the wifi is turned off -

- Response when the wifi is turned back on -

- It would be a good practice to do this health check before making any API calls as although the localhost API might be up and running (Healthy) but the external APIs might be unavailable or down (Unhealthy). And this would be the only way to know how!!
- NOTE: Under the builder.Services multiple health checks could be added in the same line of code for external APIs (for example - Database, service broker, etc.) as -
.AddCheck<ExternalEndpointHealthCheck>("OpenWeather")
.AddCheck<ExternalEndpointHealthCheck>("FlightPlans")
.AddCheck<ExternalEndpointHealthCheck>("HolidayCalendar")
Logging
- Without any specified format, the logs are in a Structured format in the VSCode terminal window.

- The format below is an example of Structured Logging -
- Here, ‘info’ is the category, ‘Microsoft.Hosting.Lifetime[14]’ is the origin of the log and ‘Now listening on: https://localhost:7009’ is the actual information logged during the service run.
- This is fine and human understandable, but to make it make sense to the machine so that external (cloud-based) logging could be possible for future retrieval and archival, this needs to be converted to a simplified version (JSON).
- To implement a more machine understandable logging, update the Program.cs to include JSON view for the same as -
builder.Logging.AddJsonConsole();- This would result in the Structured log from before along with the JSON log as -
{"EventId":14,"LogLevel":"Information","Category":"Microsoft.Hosting.Lifetime","Message":"Now listening on: <https://localhost:7009>","State":{"Message":"Now listening on: <https://localhost:7009>","address":"<https://localhost:7009>","{OriginalFormat}":"Now listening on: {address}"}}
→ Made the terminal super noisy though!!
- To solve this we could remove the default simple logging and only have the JSON logs as -
builder.Logging.ClearProviders();
builder.Logging.AddJsonConsole();
→ This should be done for Production as we don’t want too much clutter on the terminal over there.
- And we are done with a simple implementation and explanation of the MicroServices architecture in .net core 6
Comments
Post a Comment